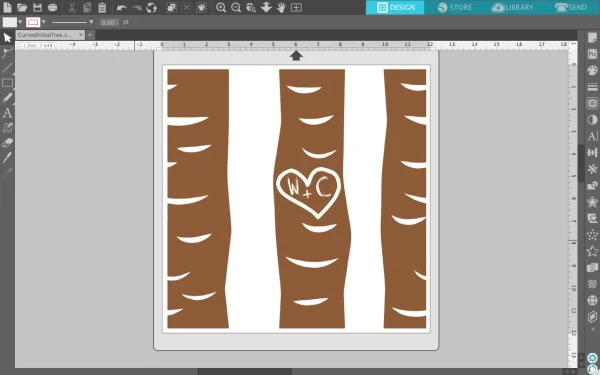
Today, I’m showing you how to create a carved initial tree trunk design with personalized initials. I think the design style is perfect for a ceramic tile, wood sign, or a card.
Design Tutorial: Tree Trunk with Personalized Initials in Silhouette Studio
You’ll need these three fonts (or similar ones) to complete this tutorial:
- Peoni Patterns – 100% free for personal and commercial use at this link.
- Brankovic – 100% free for personal and commercial use at this link.
- MTF Heart Doodle – Free for personal use, $5 donation for commercial use at this link.
- In Silhouette Studio, type the letter ‘e’ using the Peoni Patterns font. (Note: You can also use the ‘d’. It’s a slightly different tree pattern.)
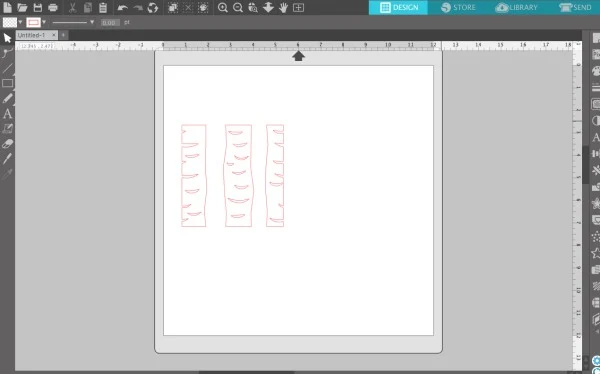
- Resize your trees as needed.
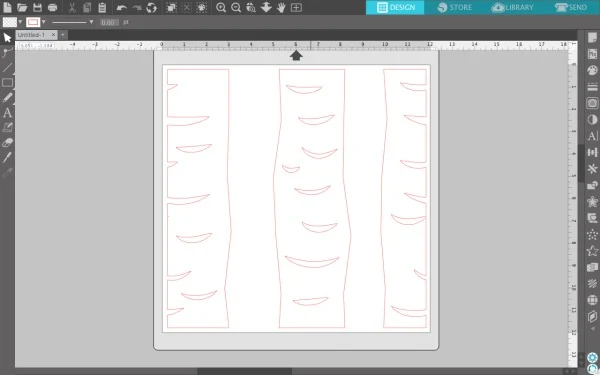
- Type a ‘c’ in the MTF Heart Doodle font and size it to fit the middle tree. Rotate it as desired.
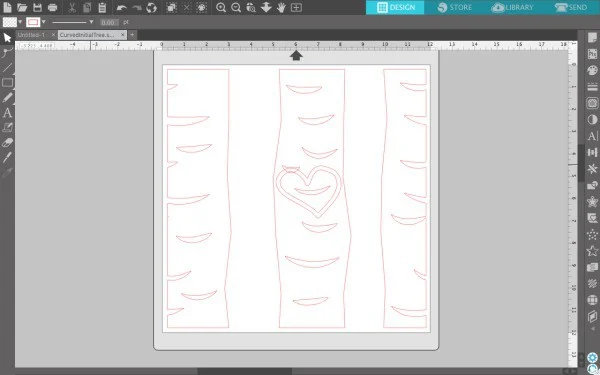
- Use the eraser tool to erase any tree detail from underneath your heart. (Be sure that the eraser is set to ‘Outline’ and not ‘Solid’.)
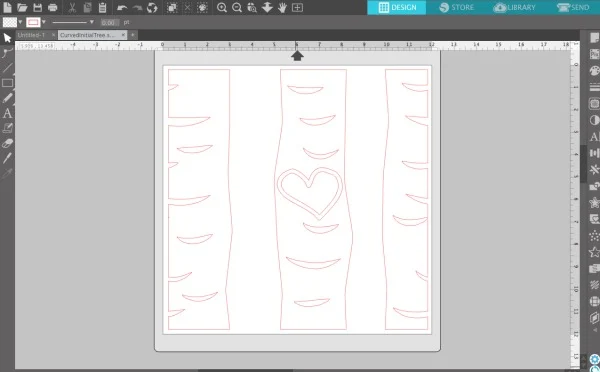
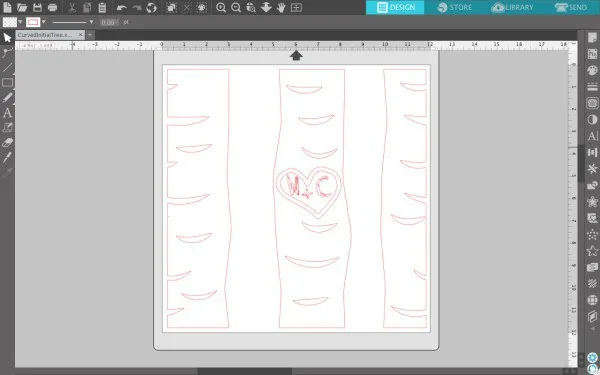
- Add the initials and a + sign inside the heart using the Brankovic font.
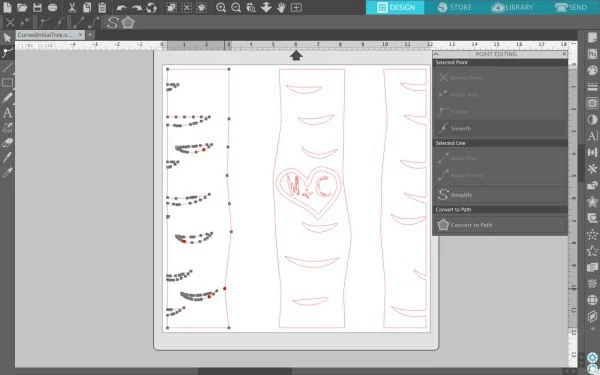
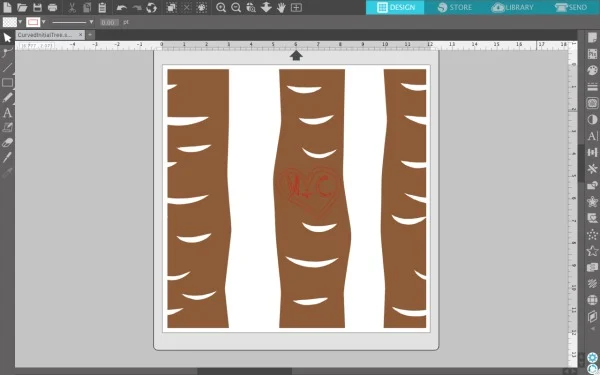
- Fill the design with any color and change the line color to the same color as the fill. (Tip: If your design won’t fill with color, double click the line of the design and single click on any red circles to close the path. For the middle tree, I had to first right click on it and ‘Make Compound Path’, then single click the red circles to close the path.)
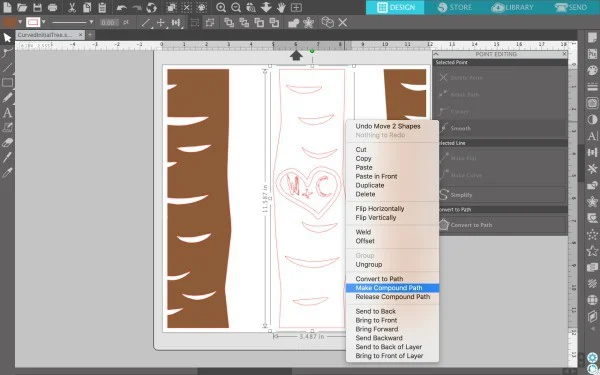 When you are finished with this step, your design should look like this:
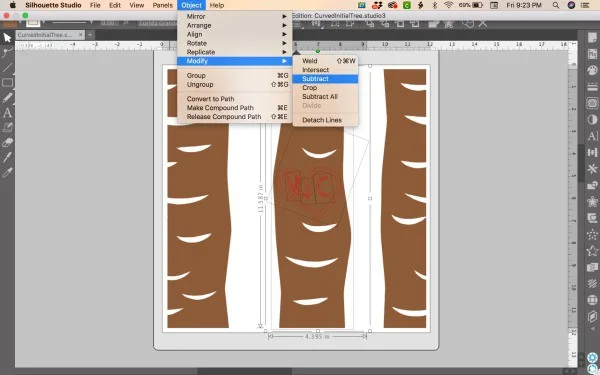
- Select the middle tree, then the heart, then the initials. (Tip: Hold down the ‘Shift’ key to select multiple objects at once.) Navigate to ‘Object’, ‘Modify’, ‘Subtract’.
But what if you want more trees? If you want to make the design a rectangle instead of square, type an ‘e’ in the Peoni Patterns font and resize it to the same size as the first trees. Then, overlap the edges of the trees very slightly. 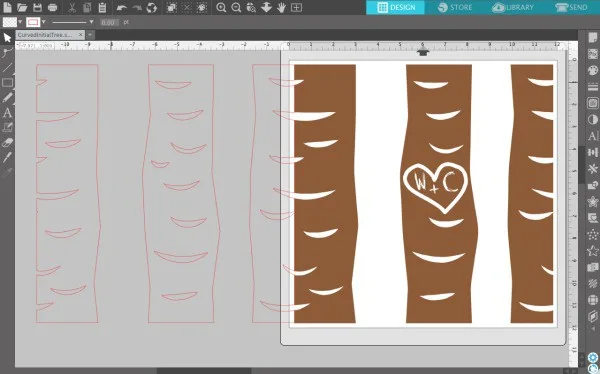
Select both objects by holding down the shift button. Then, right click and select ‘Weld’. 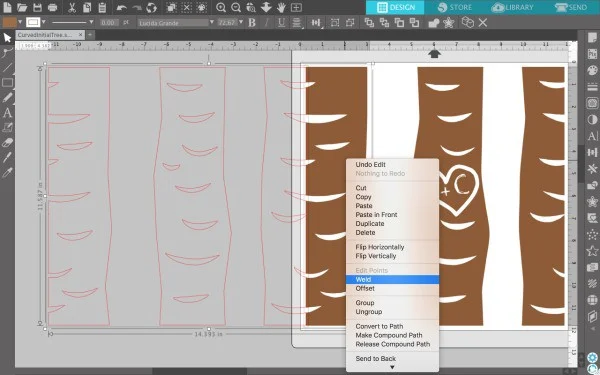
Your trees should have filled in with color. 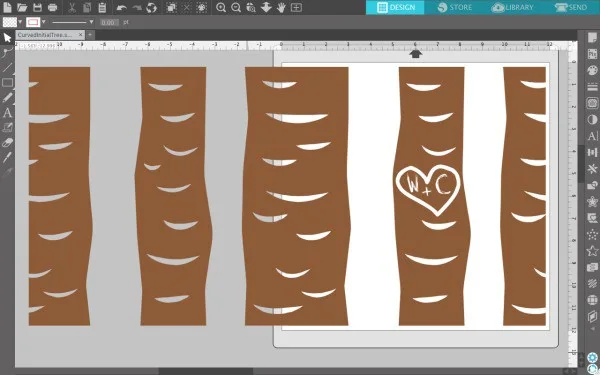
You can also do this during step 1 if you’d like to have a rectangle design with the carved initial on the biggest tree. If you are cutting a rectangle set of trees, be sure to resize your mat to fit the design.
Do you like this tutorial as much as I do? Please join our Facebook group or subscribe to our website


